Thursday, May 12, 2011

DIY Bottle Cap Necklace

My stepfather was cleaning out his junk drawer and was throwing away a ton of bottle caps! Luckily I was there just in the nick of time to save them! Heehee
So my first project is a bottle cap necklace that I made with two preschoolers and a third grader. It was soooo easy. 


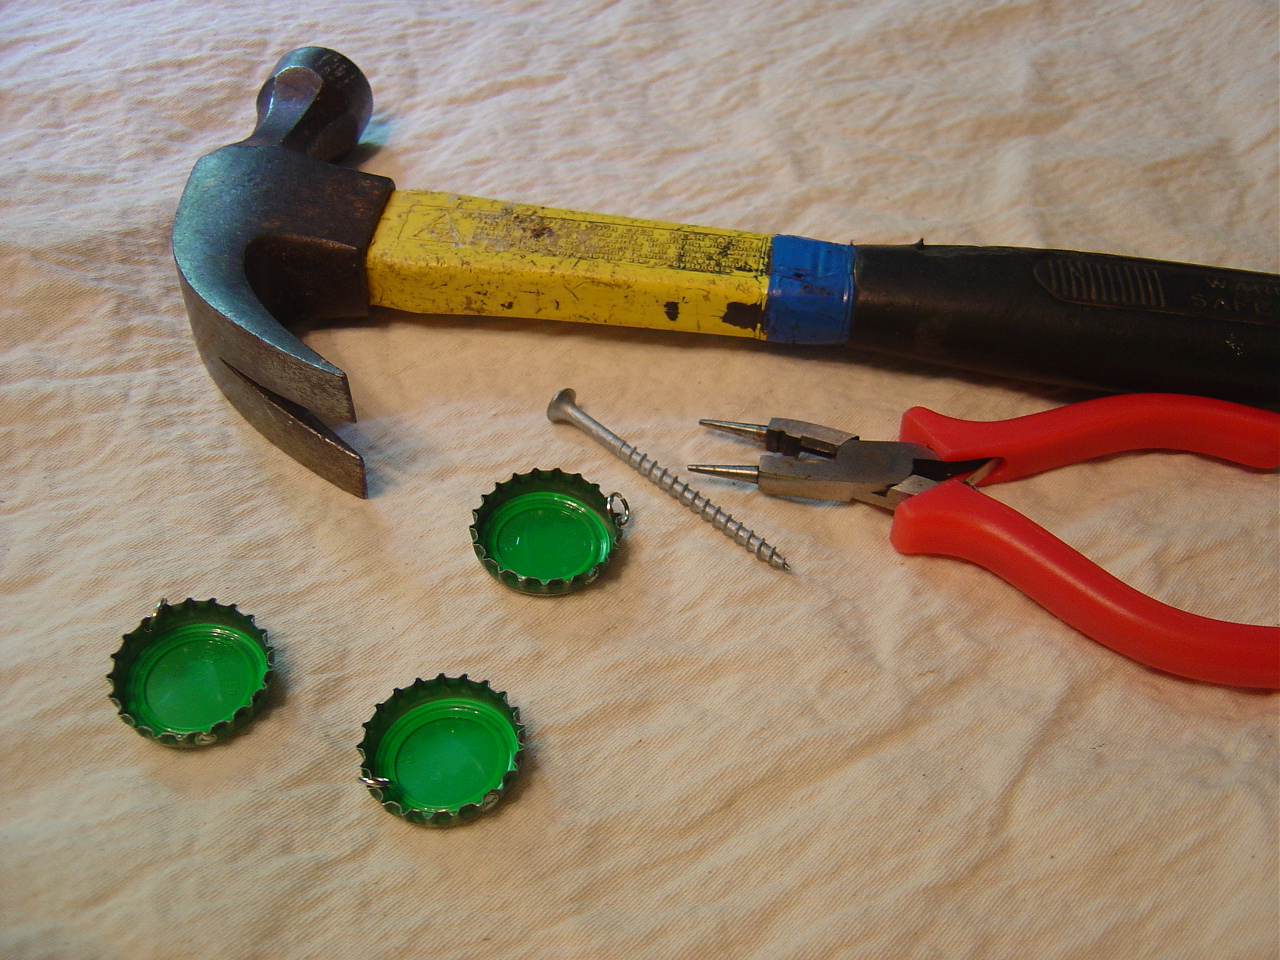
Using a nail and a hammer, put a hole in the top of the bottle cap.

I had some small silver necklace rings that I put on with pliers.

The letters are printed off my computer. I searched for monogram letters and played around with sizing. The girls colored the letters and I cut them out. I painted the bottle cap with acrylic paint and let it dry. Seal everything with fabulous mod podge.

We learned about symmetry and patterns while stringing beads. (You know I will squeeze in a lesson if I can!)


 Make sure the necklace will go over their heads and then tie a double knot.

Tuesday, May 10, 2011

Easy Dry Erase Board

 I can't believe tomorrow is Wednesday already! After an eventful weekend I guess I am just starting to come back to reality. So, most of you know that I babysit children part time out of my home and among my many part time endeavors I seem to always come back to keeping children. I guess it is my "calling" or something because when I am not keeping children I feel like something is missing in my life. I feel like it is my way of making a difference in this world. Impacting a child is one of the most important things you will ever do. I hope that through the diaper changes and preschool lessons that I show them how beautiful and wonderfully made they are. I also pray to be a blessing to the parents in a small way by giving them comfort in their long work days that their children are in a loving environment. With that said, I had a few children here today and realized that I needed a way to SIMPLY organize schedules and keep up with them. So I dug out a dry erase board from Addy's homeschool stuff and got the glue gun out!

 I bought a large piece of marker board from Lowes at the beginning of the year and had them cut it into 8 smaller pieces. It was SUPER cheap at only $10 bucks! I used painters tape to cover the edges because they were a little rough.
 I hot glued some ribbon around the edge. When I got to the corner I pinched it together and then folded it down flat.


Then I flipped it over and glued a piece of ribbon to hang it with.

Tied on a bow.....

 and hung it up! I used it immediately as you can see!

Friday, May 6, 2011

Making Your Own Foaming Dish Soap

 You know I like to share anytime I find a frugal tip so here is one that I've been doing and still love the results. I don't have a dishwasher yet but HOPEFULLY I will get one soon. In the meantime, I have become an expert dish washer myself. I love the foam dish soap, something about the foam makes me think my dishes are getting cleaner (I know it probably doesn't mean anything). I found this tip here on making my own from regular dish soap so I tried it and I am still loving it!

I use about half water and half regular dish soap and stir them together in the container. The tutorial I found is a little different. You may just need to experiment with yours a couple times to see which works best for you.


Wednesday, May 4, 2011

Recycling Project

Well, we FINALLY did it! We are "officially" recycling. I would like to say we already did but it wasn't to the extent that it should have been (and still isn't to be honest, but we are getting better). Things slipped through to the trash and we were lazy about it
All it really took was a quick look at what our town's recycling guidelines were. I printed out the ALLOWED and NOT ALLOWED things off the computer and gave them to Addy to start her creative juices flowing. Now that I have a better understanding of what can and cannot be put into our recycling bin it is so much easier and if I forget I have Addy's brightly colored sign to remind me!


Tuesday, May 3, 2011

It's Tuesday!

My two favorite Linky Parties are on Tuesdays! 

Tip Me Tuesday at Tip Junkie 


and Get Your Craft On Tuesday at Today's Creative Blog


Check them out and get some great ideas!
Here are some of my favorite ones from today.....


 I am using this idea for a baby shower!


You know I love this! Educational and Recycle!!

HAVE FUN & GET CREATIVE!

Sunday, May 1, 2011

Mother's Day Poem

I have been using this poem for years as a Mothers Day project for preschoolers. It STILL makes me cry!
Just put a child's handprint on a flower pot, frame, card, etc. and print out this poem. Don't forget to put the date on it.  Great for Grandmas too!
 To My Mommy, 
Sometimes you get discouraged
Because I am so small
And always leave my fingerprints
On furniture and walls
But every day I'm growing --
I'll be grown some day
And all those tiny handprints
Will surely fade away
So here's a little handprint
Just so you can recall
Exactly how my fingers looked
When I was very small 


Tip for making handprints: Use a paintbrush or sponge to apply paint to hand.